Biggest Cyber Week sale is On
Up to 81% off web hosting + website builder
- Free Domain, SSL & Website Builder
- Free Website Migration
- 24/7 Customer Support
₹ 111/mon
+3 months free
- 30-day money-back guarantee

.com for only ₹999*/first year.
Protect Your Brand with Free SSL Security
- 99% uptime gurantee | With Free Professional Email Address | Free domain

Websites + Marketing
Fastest Web Hosting
Start Your Online Journery With Fall Savings: Up to 85% off hosting +free website builder
Free Themes & Plugins WORTH RS.18000
Don’t Just Host Your Website, Design It Beautifully and Securely, Without Compromise Free Premium Themes & Plugins Included with Every Plan. Get a web hosting today and let your creativity soar!

15 Years of Experience

Our Trusted Services By Millions.


WEB HOSTING
With a 3-yr term. You pay ₹ 1,764.00 today.
Renews at ₹ 2164.00.
- SAVE 59%
₹ 121
₹ 29/mon
Buy low cost and surprisingly fast web hosting plans in India which Free SSL & unlimited sub domains
WORDPRESS HOSTING
- SAVE 73%
₹ 149
₹ 49/mon
Includes free themes & plugins to make your hosting journey affordable & manageable.
UNLIMITED HOSTING
- SAVE 80%
₹ 499
₹ 51/mon
Start your Web Hosting business with ease of backed stress & server management.
RESELLER HOSTING
- SAVE 60%
₹ 499
₹ 199/mon
Start your Web Hosting business with ease of backed stress & server management.
CLOUD VPS
- SAVE 53%
₹ 399
₹ 199/mon
Start your Web Hosting business with ease of backed stress & server management.
Shared Hosting Features, That Boost Your Online Success.
99.99% Uptime
Experience industry-leading reliability – your website stays live, guaranteed.
30 Days Money-back
We’re so confident you’ll love our hosting, we offer a risk-free trial.
100% Free SSL
Your website’s security and SEO are our top priorities, from day one.
NVMe SSD Storage
The fastest storage available for unparalleled website speed.
LiteSpeed
Optimized for superior performance, even during peak traffic.
24/7 Support
Expert assistance whenever you need it, because your success matters.
Easy Control Panel
The industry’s best control panel for effortless website management
NVMe SSD Storage
The fastest storage available for unparalleled website speed.
Email Accounts
Create professional email addresses that reflect your brand.
RAID Technology
Redundant storage ensures your data is always protected
DDOS Protection
Access your email seamlessly from any device, anywhere.
Daily Backups
Automated backups provide peace of mind and data recovery options
Free Privacy Protection / Free DNS Management
Search & Buy Domain for your business today
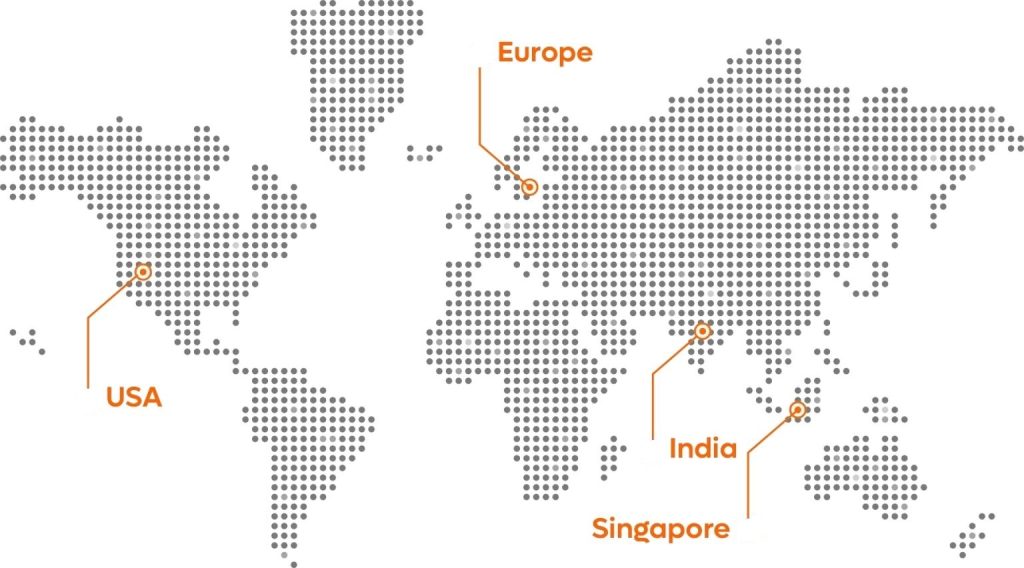
Global Presence
Our Data Center Locations
Experience lightning-fast website speeds and global reach with our strategically located data centers in Europe, Singapore, India, UK and USA. Choose the ideal location for your websites to ensure optimal performance and low latency, no matter where they are in the world. Our robust infrastructure guarantees 99.99% uptime, keeping your websites online and accessible around the clock.


